How to track your periods with Apple Watch: Its simple, safe and secure

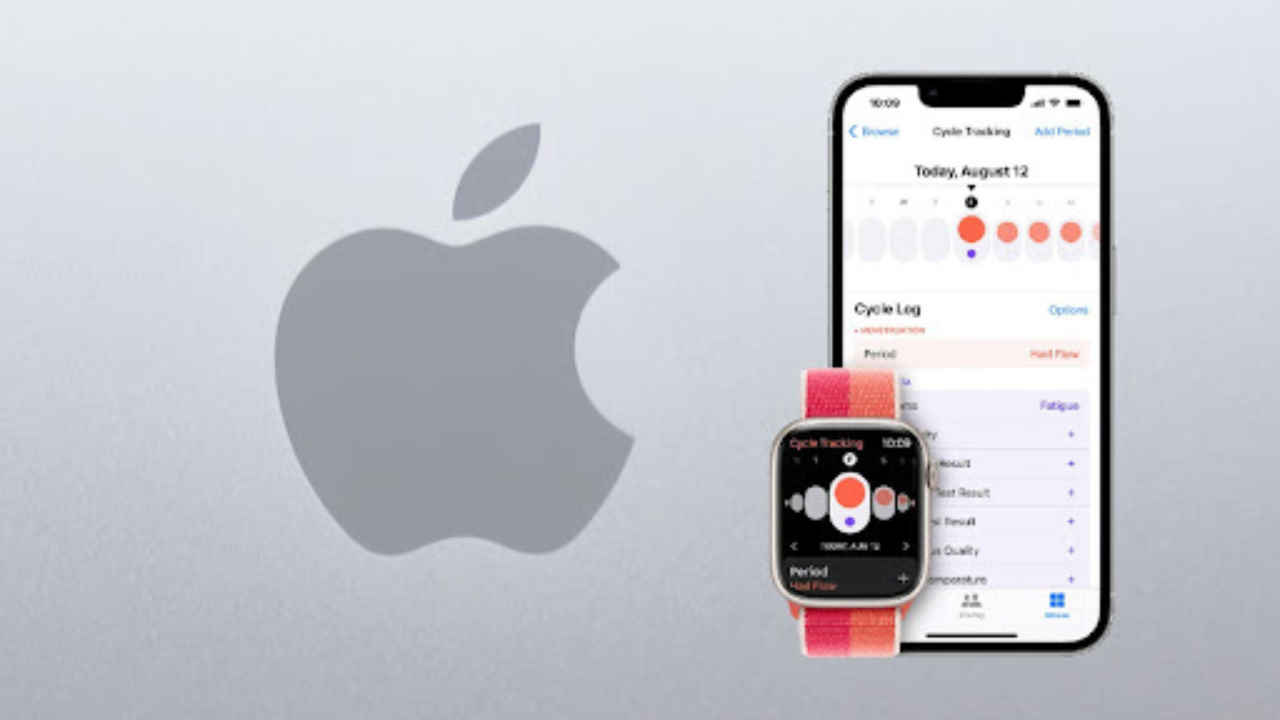
There are multifaceted features that you can browse and benefit from on the iPhone and Apple Watch, and one of the unexplored yet prevalent features is the ‘Cycle Tracking’ feature for the iPhone. An individual can easily keep tabs of their/partner’s menstrual cycle and align their goals and symptoms.
The process of setting up the cycle tracker is easy and efficient in its user interface. There are step-to-step instructions in operating the tracker. However, to understand all the elements at once, here’s our guide on how to set-up a menstrual tracker on an iPhone.
Also read: Hammer Ace Ultra is a sub ₹3000 Apple Watch Ultra look-alike
How to set-up Cycle Tracking on your iPhone
1. Locate the ‘Health App’.
2. Select ‘Browse’ on the bottom of the screen.
3. You’ll see Cycle Tracking as one of the options. Select ‘Cycle Tracking’.
4. Upon selecting ‘Get Started’. There will be instructional briefs given about the predictions, cycle history and privacy and security. Select ‘Next’ to continue to start the set-up.
5. Once you are in the set-up process, you will have to provide information about your previous period, the number of days it lasts for and how long it typically lasts. Note that you can skip adding your previous cycle details if you’re unsure and start tracking from the next course.
6. Upon the completion of the primary details, select ‘Next’ and you will be directed to a three action carousel where you get to pick the factors that are affecting your periods, your ideal period tracking and log options with fertile window estimates. These detailed features help in keeping a summary of your menstrual activity when you’re visiting a doctor or trying to conceive.
7. Once you select ‘Next’, you’ll land on an instructional page that will give you the details of how periods are represented. A solid red on the chart symbolises a noted period. A small circle accompanying the red dot displays any symptoms that you’re having such as headache or cramps during the cycle and lastly, a tint of red circle that predicts the date of your next period.
8. With the selection of ‘Next’, you have successfully set-up your menstrual tracker. Now you can keep tabs on your cycle without having to download any other external application or jotting it down on your calendar.
9. In order to check the highlights of your cycle, you just have to select Cycle Tracking and you’ll see all the data in one place. Such as red dots depicting your upcoming cycle, a manual option to add your period.
Also read: iPhone 15 Ultra mockup unboxed revealing USB-C port and other new details
How to access menstrual cycle tracker in your Apple Watch
Once you are done setting up your details on the Health App on your iPhone, you can easily track and add symptoms to your chart from your Apple Watch. Let us show you how easy that is.
Select the Cycle Tracker App on the watch
Now scroll down to get information on your predicted period or previous period.
You will notice a ‘+’, add, a sign connected to Periods, Symptoms and Spotting. This enables the user to add the personalised factor from their Apple Watch.
You can select and enter the flow of your period and select from more than 15 symptoms.
You can add Spotting in your calendar to keep a track of when you started getting the signs of your periods starting.
The information will be logged into your Health App where you can access it at any given time.
Since the Series 1 model to now Apple Watch Ultra, the Cycle Tracking app has worked on all the versions of the Apple watch. As for the iPhone, the application requires the iPhone model to be iPhone 6’s successors and should be running Android 13. Additionally, if you require a data sheet of all the menstrual activities you have added in the tracker you can attain that from your Apple Watch.


