Your HomeKit journey starts with adding a home to the Home app. Here’s how!

If you’ve just launched Apple’s Home app and you’re wondering how to set up a new home, this is how!
Apple’s Home app is the command center for all of the best HomeKit accessories, putting your door locks, light bulbs, and more just a few taps away. Before getting started, though, you need to create a home for all of your accessories. Thankfully, the Home app makes this process incredibly easy, so you can be up and running in seconds. Here’s how to add a home to the Home app!
How to add a home in the Home app
By default, the Home app will automatically create a home for you called My Home when you launch the app for the first time. With the default home, you can begin adding accessories, creating rooms, setting custom wallpapers, and more.
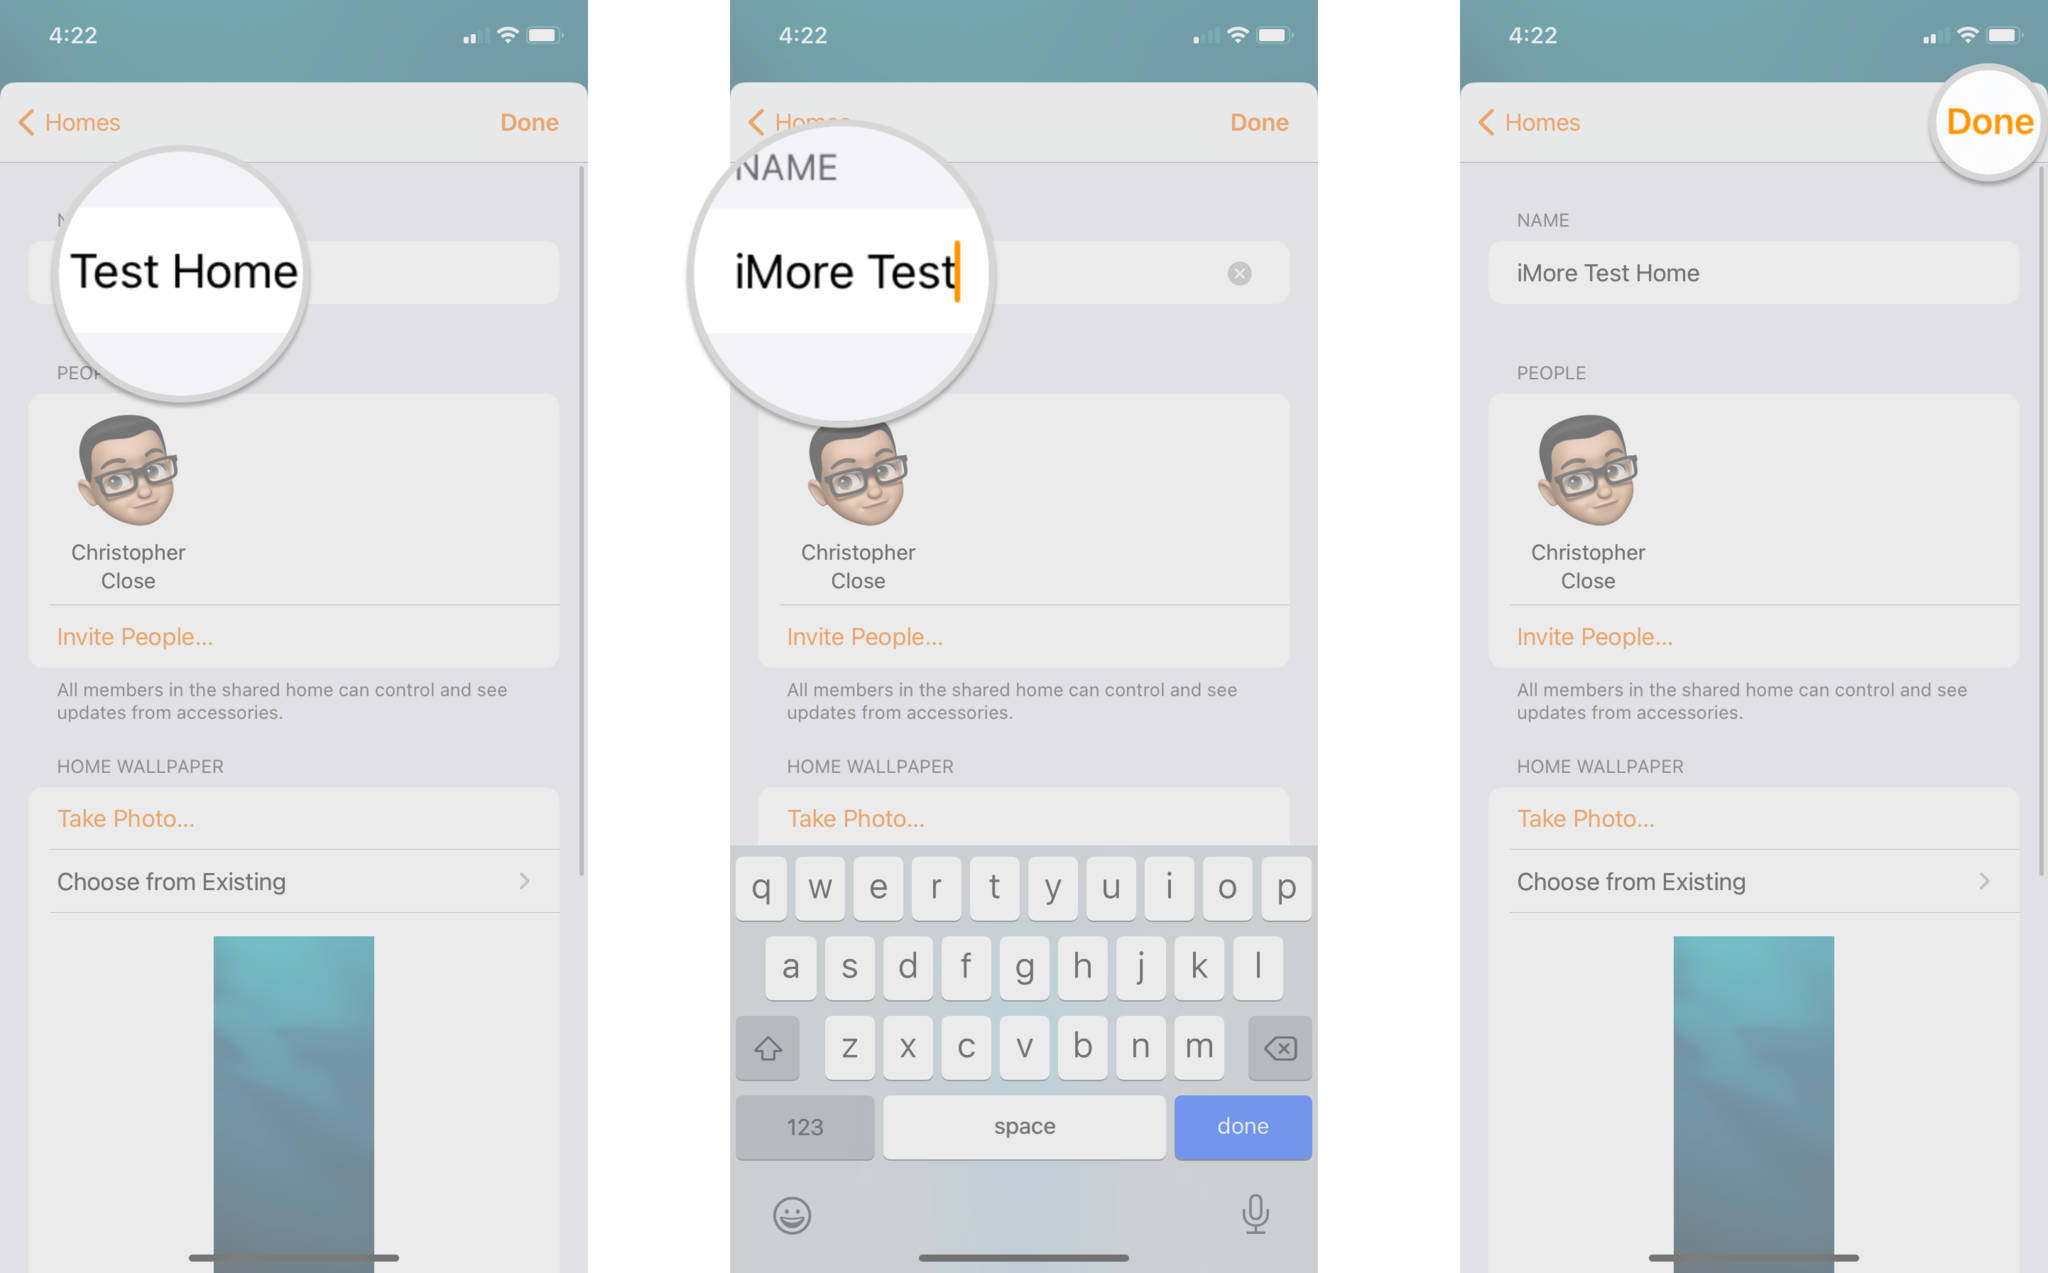
How to rename a home
If you want to get creative with your home’s name, you can change things up via the Home Settings menu in the Home app.
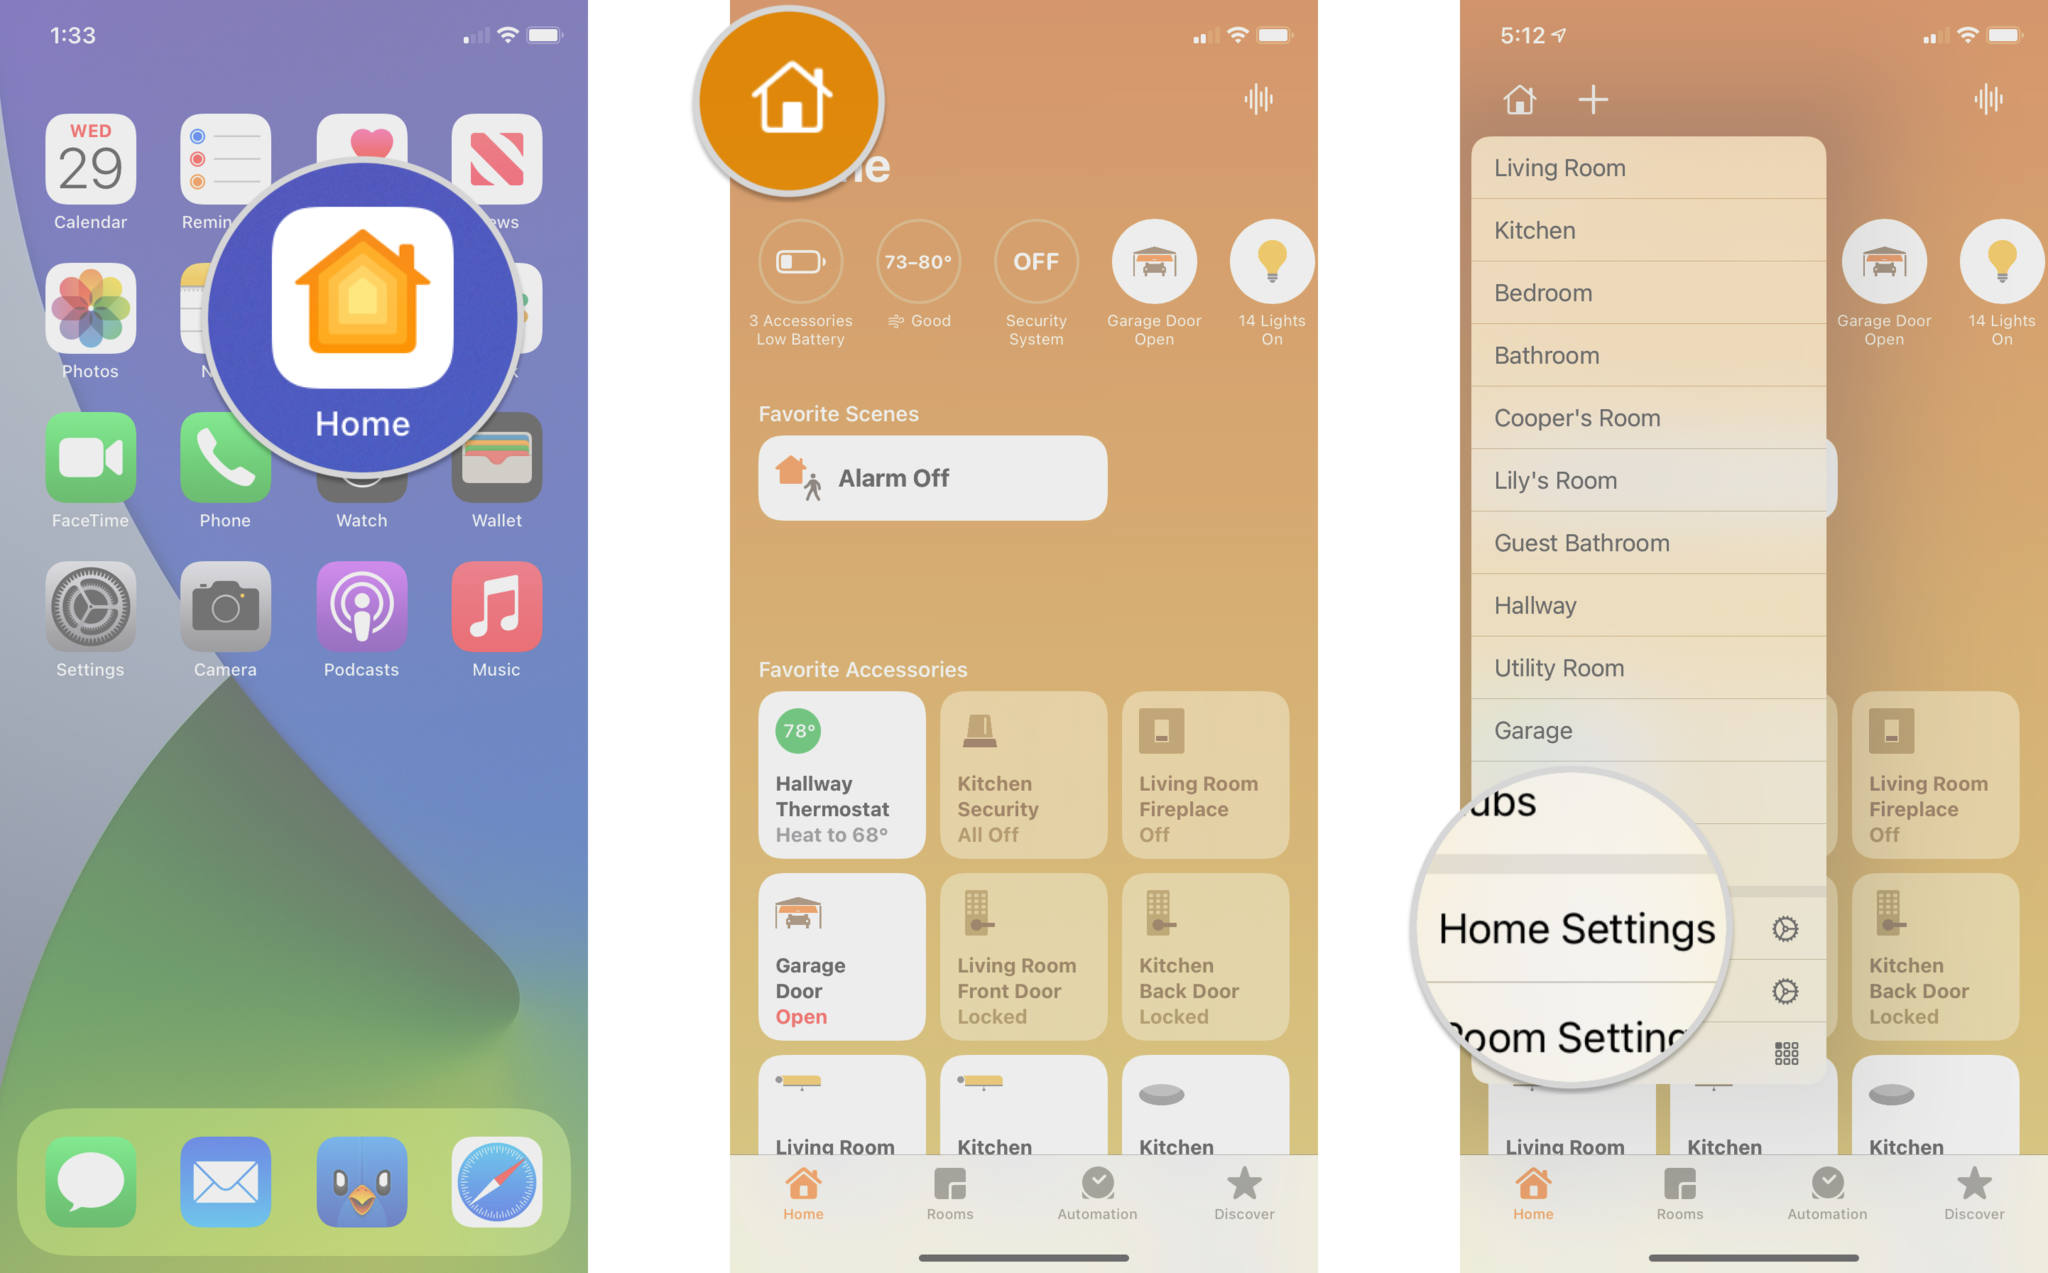
- Launch the Home app.
- Tap on the House icon near the top left corner.
-
Tap Home Settings.

- Tap the current house Name to bring up a keyboard.
- Type in your desired Name.
-
Tap Done to save your home’s name.
How to invite people to join a home
If there are other members of your home to whom you’d like to give control of your HomeKit accessories, here’s how:
- Launch the Home App.
- Tap the House Icon in the top left corner of the screen.
-
Tap Home Settings.

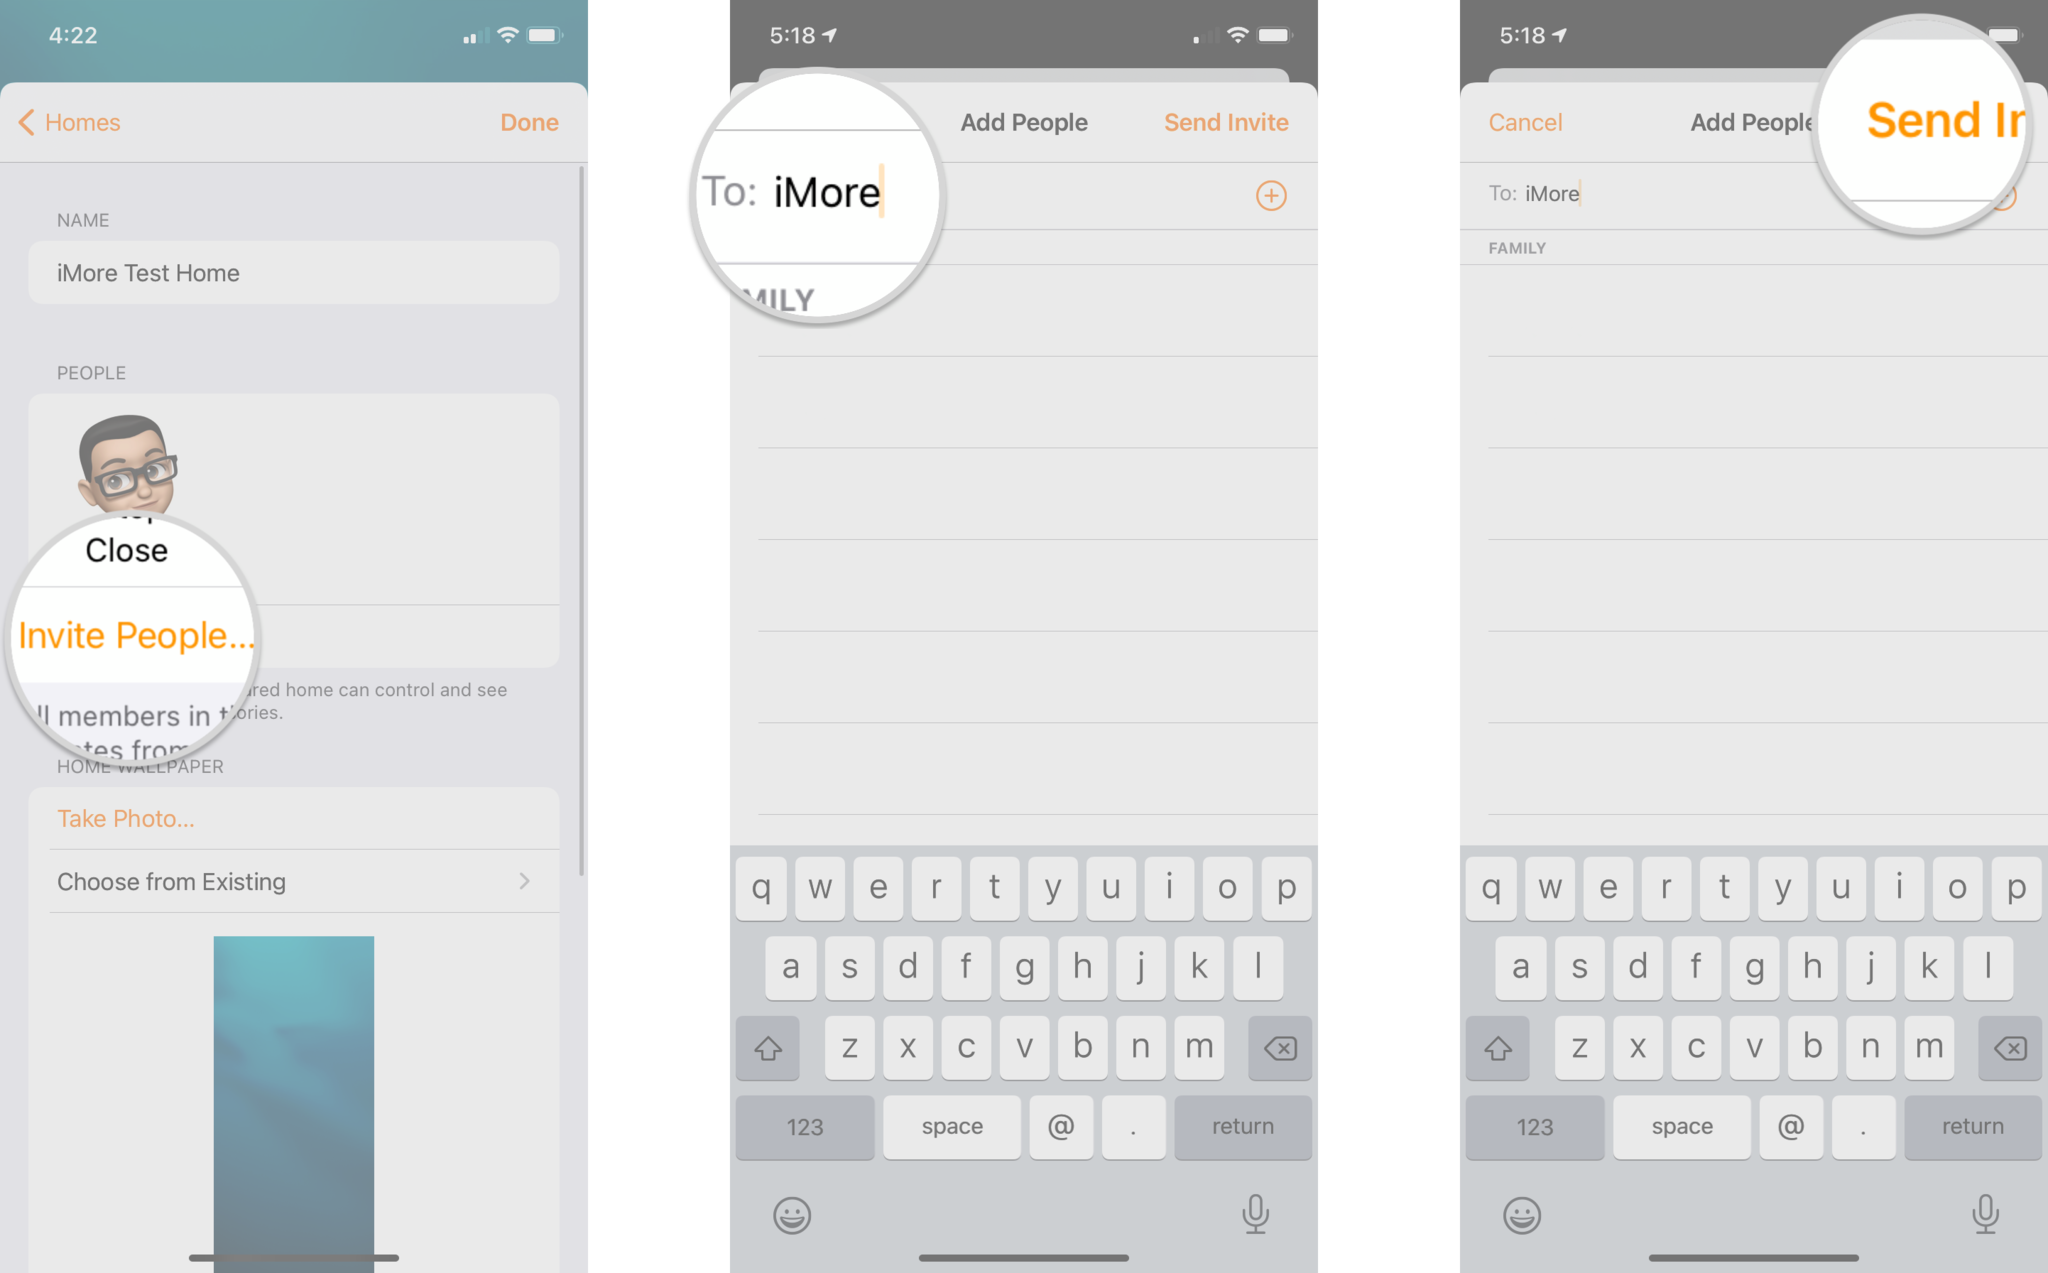
- Tap Invite People….
- Type in the Name of the Person you’d like to invite.
-
Tap Send Invite in the top right corner.
- You’ll know you’re successful if the person appears in the People section with the words Invitation Pending beneath their name and profile photo.
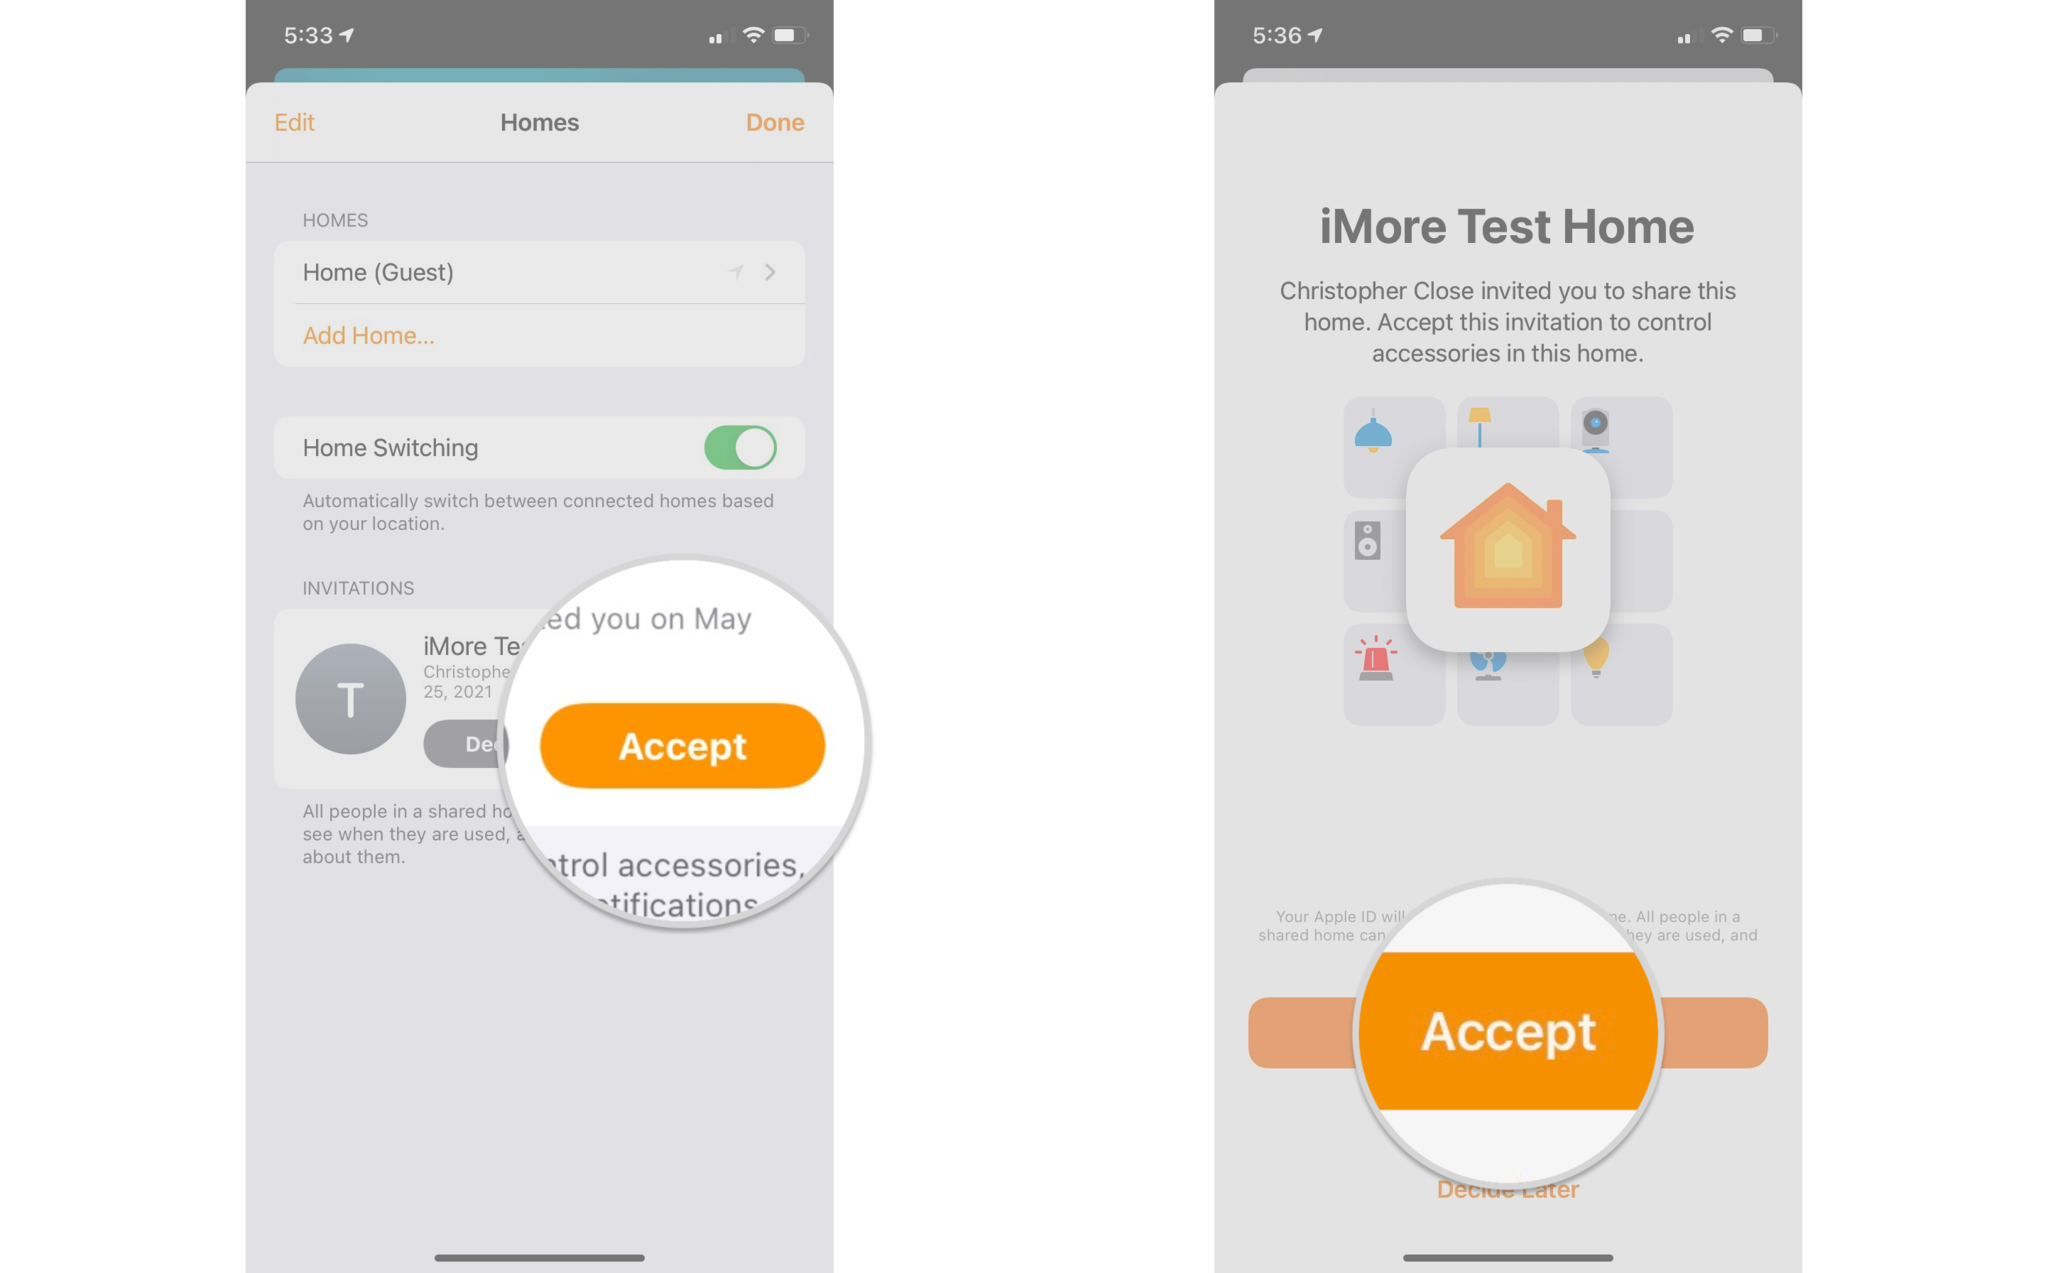
How to accept an invitation to join a home
If you’re receiving an invite (or need to help someone with an invite you’ve sent), here’s how you accept an invitation:
- Launch the Home app.
- Tap the House Icon in the top left corner of the screen.
-
Tap Home Settings.

- Review your invite, then tap Accept.
-
Tap Accept to join the home.
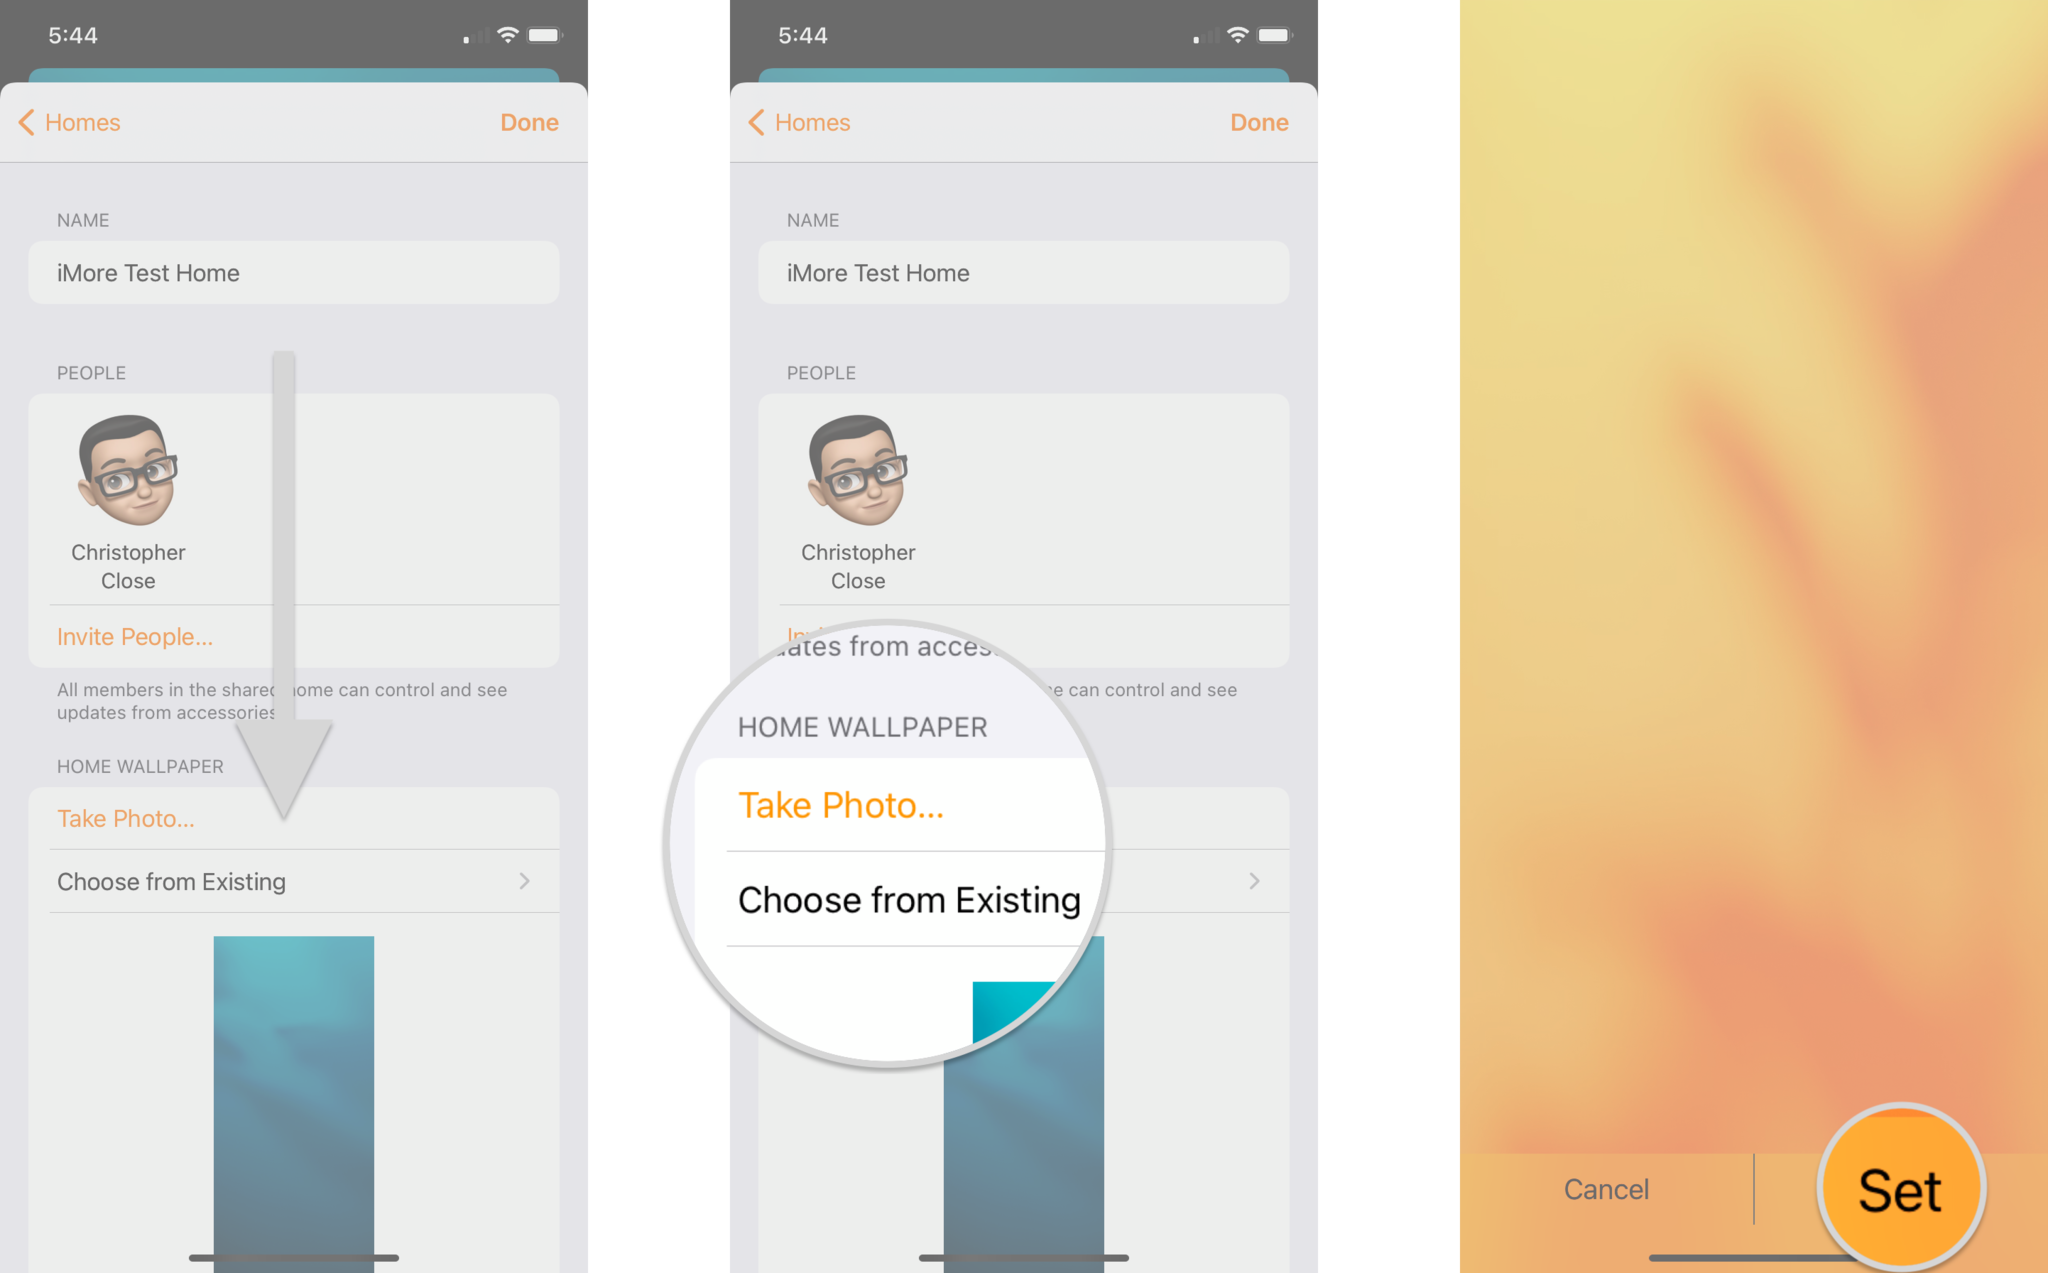
How to personalize your home wallpaper
If you have multiple locations to control with the Home app (or you want to customize the app’s look and feel), you can change the Home wallpaper. Here’s how:
- Launch the Home app.
- Tap the House Icon in the top left corner of the screen.
-
Tap Home Settings.

- Scroll down until you reach the Home Wallpaper section.
- Tap Take Photo… to take a brand new photo or Choose from Existing to pick a photo from your library or one of the defaults.
-
Tap Use Photo or Set once you’ve adjusted the photo to your liking by panning and zooming.
How to add notes to a home
The Home app provides a handy little field for storing notes that are viewable by anyone who’s received a home invite. If you have a HomeKit-controlled rental property, for example, you can leave notes for your tenants in this field. How do you add notes to your home? Follow along:
- Launch the Home app.
- Tap the House Icon in the top left corner of the screen.
-
Tap Home Settings.
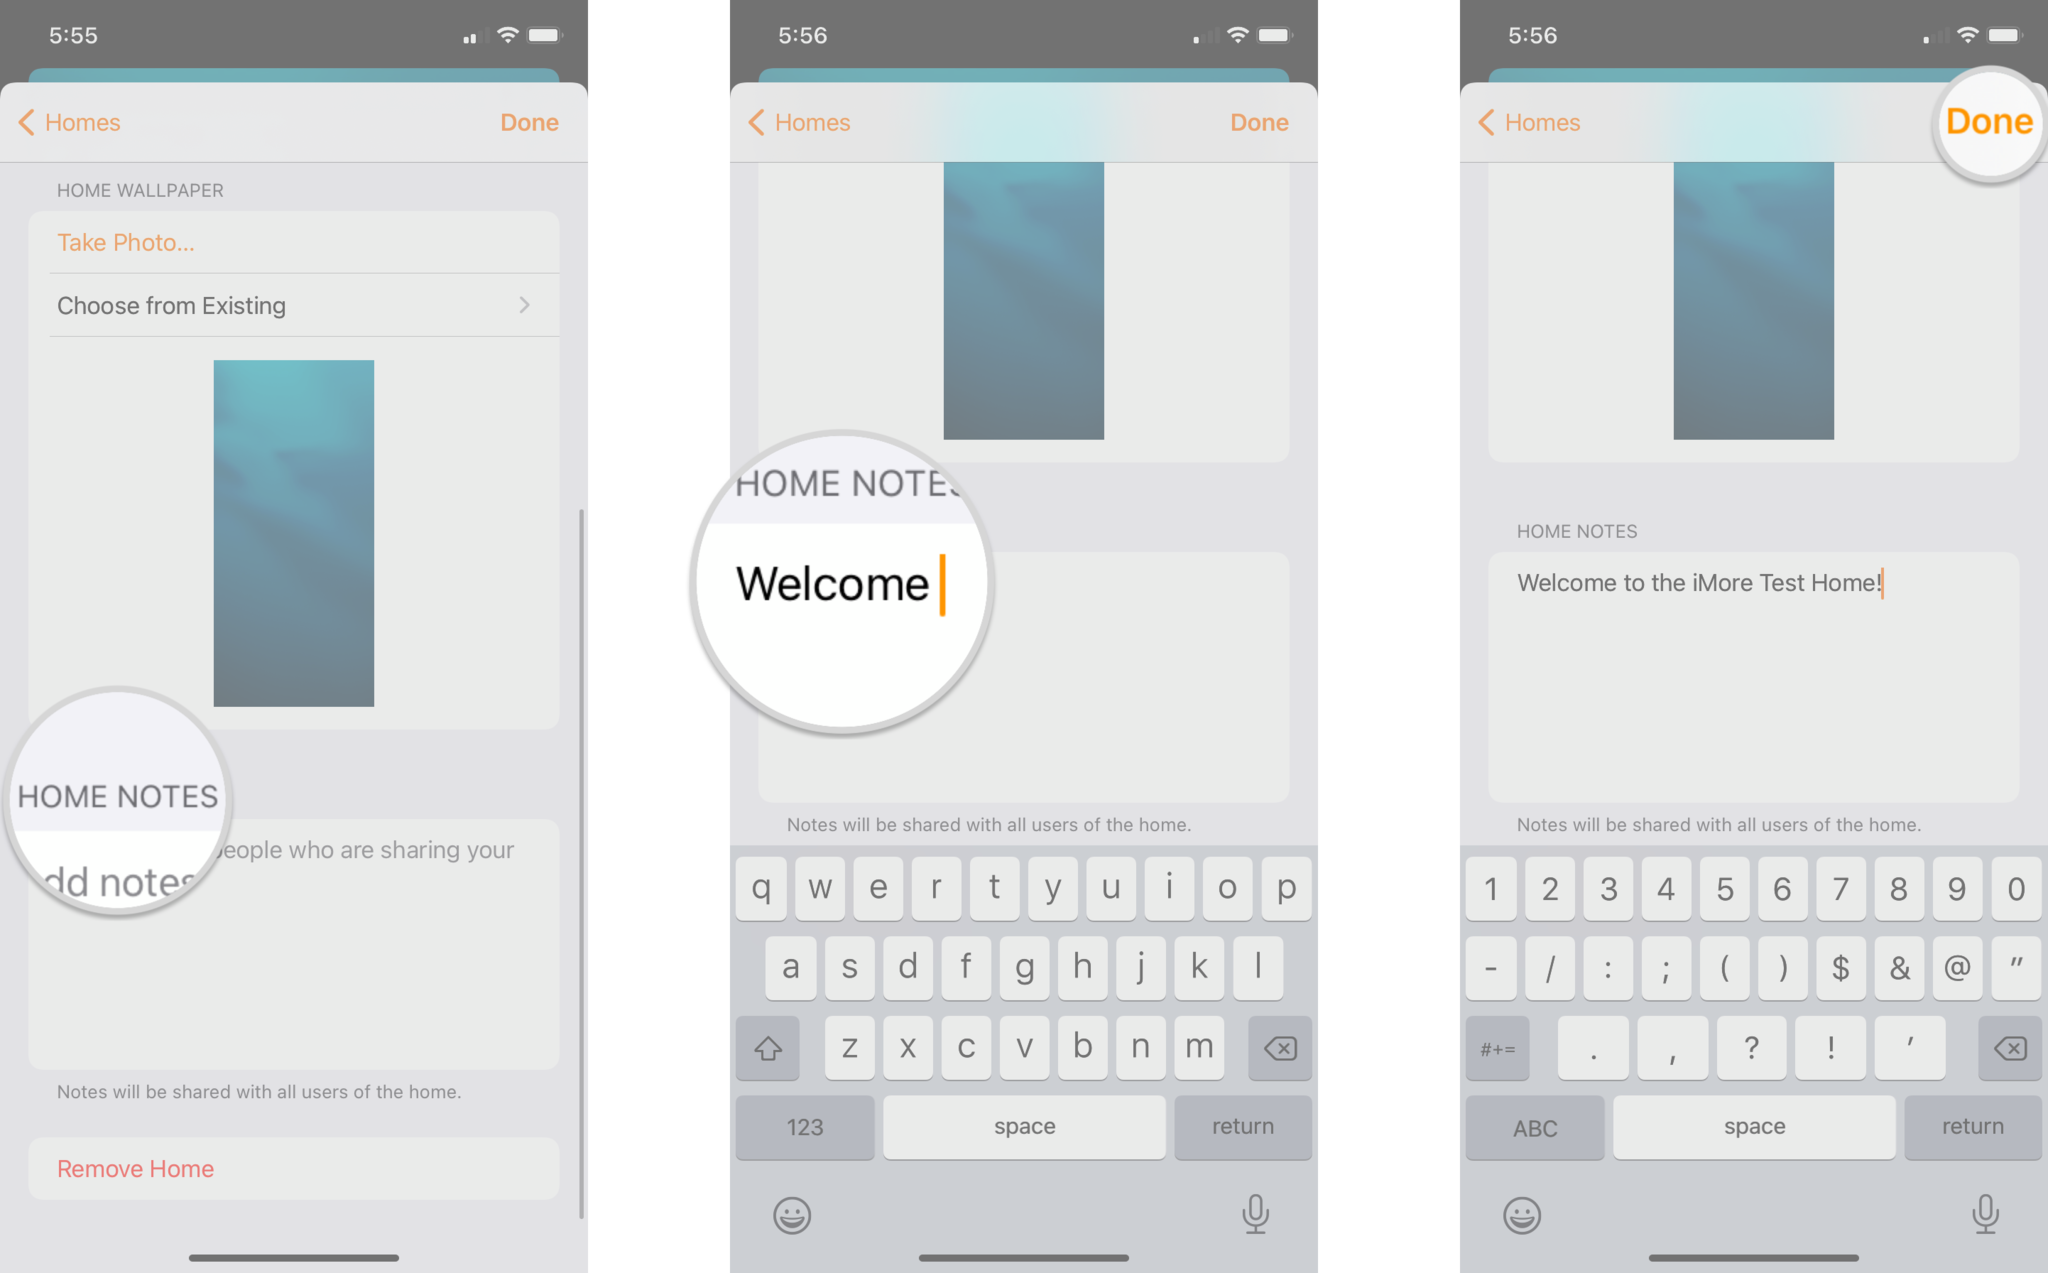
- Scroll downward until you reach the Home Notes section, then tap on the Notes field
- Type in your desired message for your family or guests.
-
Tap Done in the top right corner when finished.
How to remove a home
- Launch the Home app.
- Tap the House Icon in the top left corner of the screen.
-
Tap Home Settings.

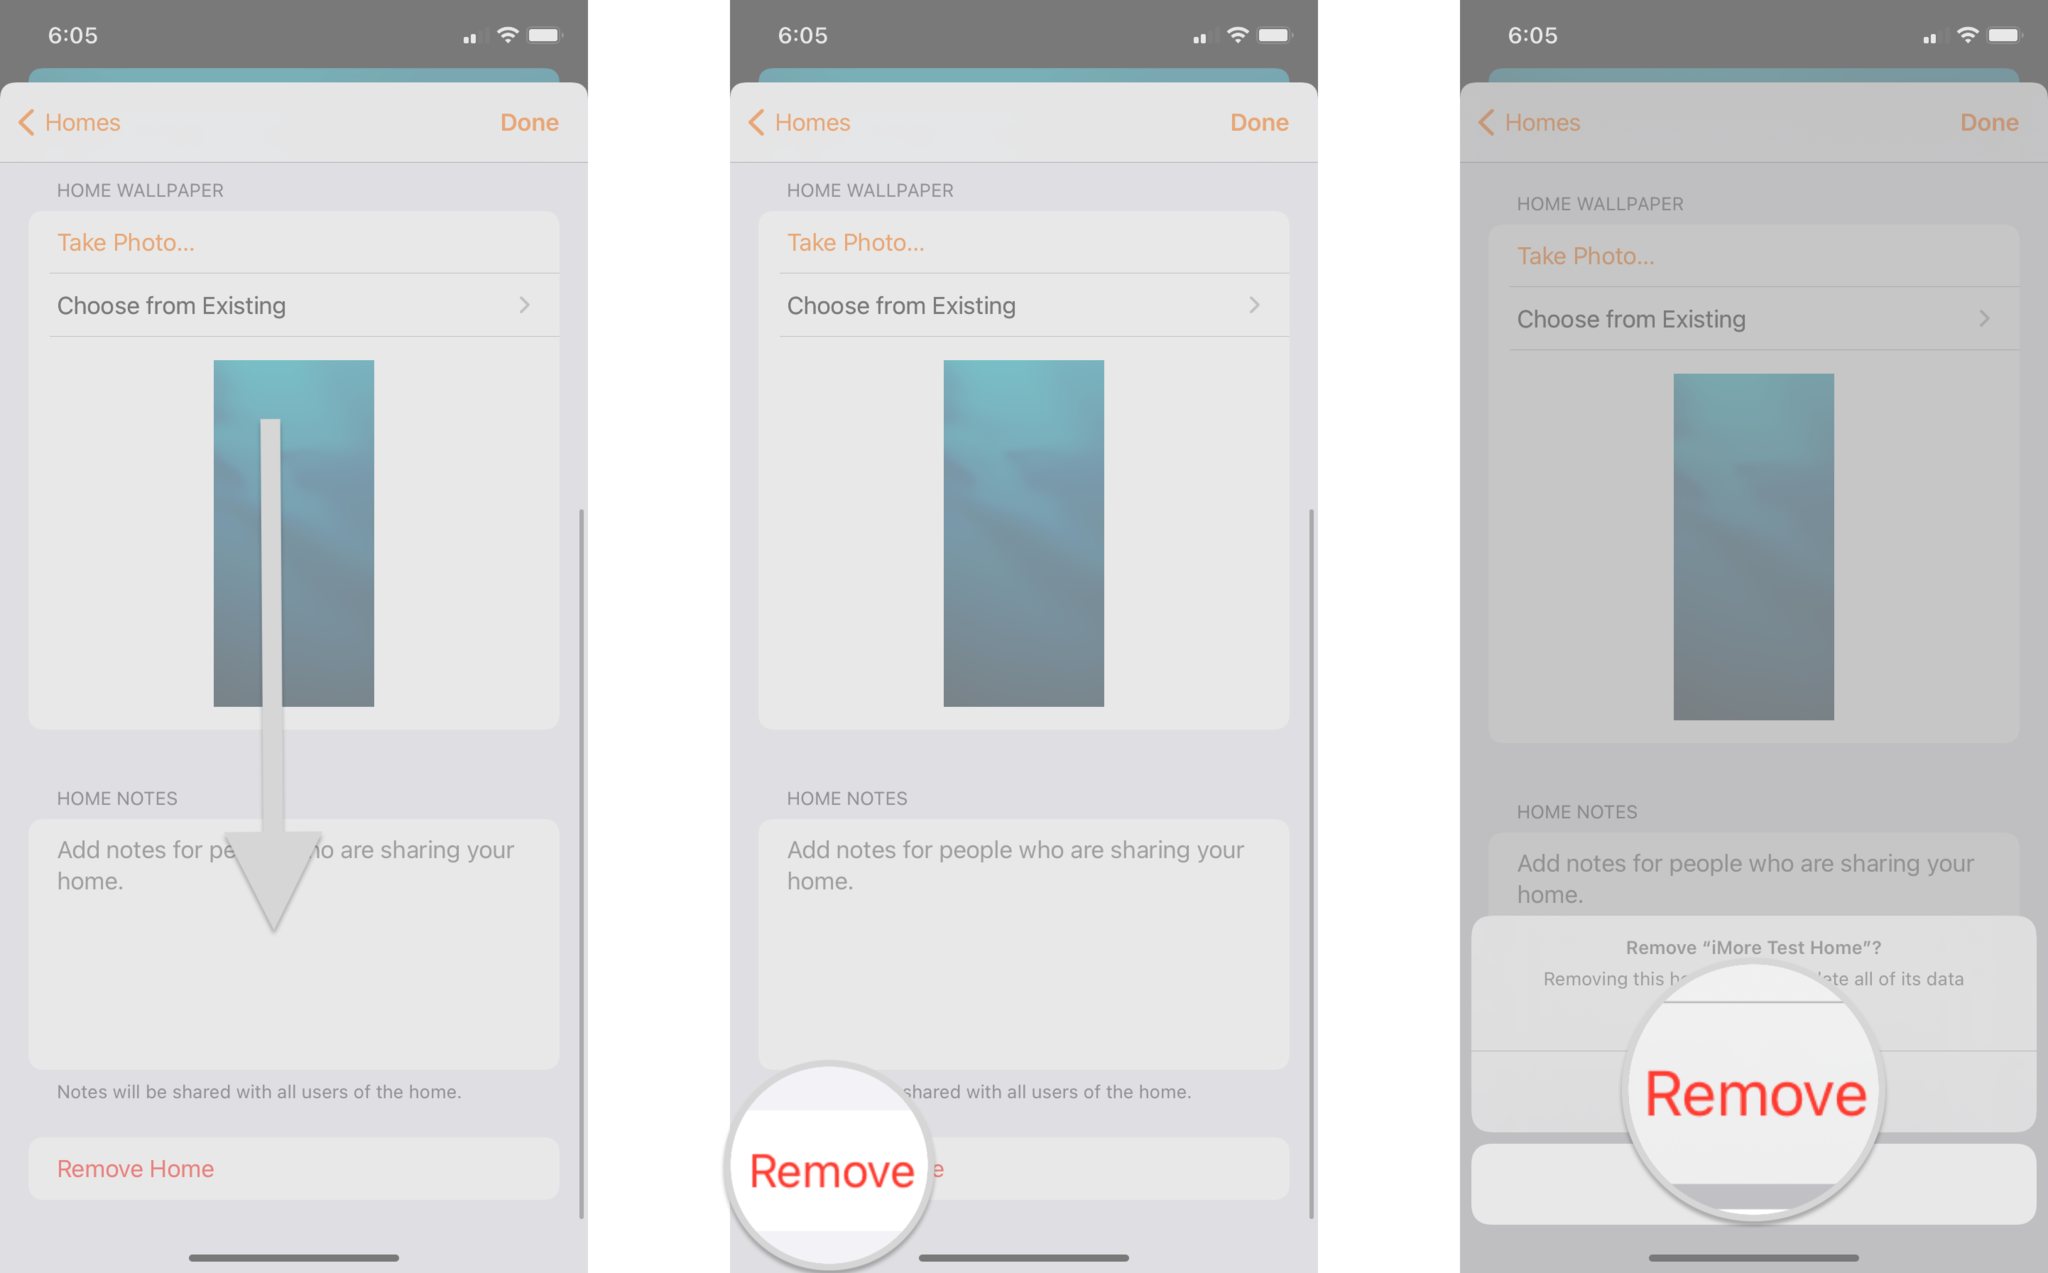
- Scroll down to the bottom of the Home app settings page.
- Tap Remove Home.
-
Tap Remove on the confirmation pop-up list. This is the last step before your existing home will be deleted. Only proceed if you are ready to remove it.
Keep in mind that when you remove a Home, you’re also removing the corresponding data synced to iCloud. Your guests will lose access to your HomeKit accessories and customizations as well.
Questions about how to add a home to the Home app?
That covers everything you need to know about adding a Home in the Home app. If you’ve any questions, let us know in the comments below!